Overview
The Lighweight Directory Access Protocol, better known using its acronym LDAP, provides a directory service for users and other objects. It’s used primarily to provide single sign-on authentication across your environment, from servers to web applications.
This tutorial will walk you through deploying and configuring an LDAP server on CentOS 7.
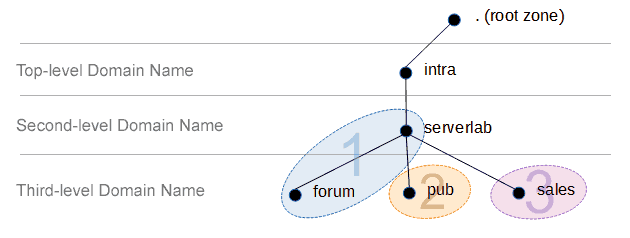
The environment used in this tutorial has the following configuration.
| Domain | corp.serverlab.intra |
|---|---|
| Domain DN | dc=corp,dc=serverlab,dc=intra |
| LDAP Server | server01.corp.serverlab.intra |
Install OpenLDAP
- Log into server with an account that has administrative rights.
- Install the required packages using Yum.
yum install openldap-servers openldap-clients nss-pam-ldapd
Configure the Domain
Create Password for the Manager Account
The Manager account is the default administrator – also known as the Root account – for OpenLDAP. This account has full rights over LDAP and needs a secure password. This step will guide you through the process of generating an encrypted password for the account.
- Use the slappasswd to create an encrypted password.
slappasswd
- When prompted, enter a new password.
- When prompted, re-enter the new password.
- slappasswd should not output an encrypted form of the password entered.
{SSHA}BvCGYqos1HWnzIzAnxNTgqu9xRErywaPMake not of this output and document it. We’ll be using it shortly.
Configure the Database
- Open the LDAP Database file into a text editor.
vi /etc/openldap/slapd.d/cn=config/olcDatabase={2}bdb.ldif - Find the following lines.
olcSuffix: dc=example,dc=com
olcRootDN: cn=Manager,dc=example,dc=com
And modify them so that they point to your domain’s distinguish name (DN). In this tutorial, ours is dc=corp,dc=serverlab,dc=intra.
olcSuffix: dc=corp,dc=serverlab,dc=intra
olcRootDN: cn=Manager,dc=corp,dc=serverlab,dc=intra
- Set the password for the Manager account using the one generated earlier. Add the following line below the olcRootDN line.
olcRootPW: {SSHA}1gChY5Xzoozcd73sOma9v6qocpRBWpkP - Save your settings and exit the text editor.
Configure Monitoring Privileges
The Monitor backed allows users to query your LDAP database for information. This can be perceived as a security risk in some environments. Therefore, you may want to limit who can access it. We’ll grant access to the Manager account and deny everyone else.
- Open the OpenLDAP monitoring configuration file into a text editor.
vi /etc/openldap/slapd.d/cn=config/olcDatabase={1}monitor.ldif - Find the following line.
olcAccess: {0}to * by dn.base="gidNumber=0+uidNumber=0,cn=peercred,cn=external,cn=auth" read by dn.base="cn=manager,dc=example,dc=com" read by * noneAnd modify it to by pointing to the DN of your Manager account.
olcAccess: {0}to * by dn.base="gidNumber=0+uidNumber=0,cn=peercred,cn=external,cn=auth" read by dn.base="cn=Manager,dc=serverlab,dc=intra" read by * none - Save your changes and exit the text editor.
Create the Database Config file
This file is used to tune OpenLDAP. The example file the accompanies the OpenLDAP server install is good for starting out, however, its settings may be too conservative for today’s hardware.
- Create the database config file by copying an example template.
cp /usr/share/openldap-servers/DB_CONFIG.example /var/lib/ldap/DB_CONFIG
- Assign the appropriate permissions to the database config file.
chown -Rf ldap:ldap /var/lib/ldap/
Create a User Account
- Create a user named Admin.
dn: uid=admin,ou=Users,dc=your-domain,dc=com
uid: admin
cn: admin
objectClass: account
objectClass: posixAccount
objectClass: top
objectClass: shadowAccount
userPassword: password
shadowLastChange: 15140
shadowMin: 0
shadowMax: 99999
shadowWarning: 7
loginShell: /bin/bash
uidNumber: 999
gidNumber: 999
homeDirectory: /home/ldap


