Overview
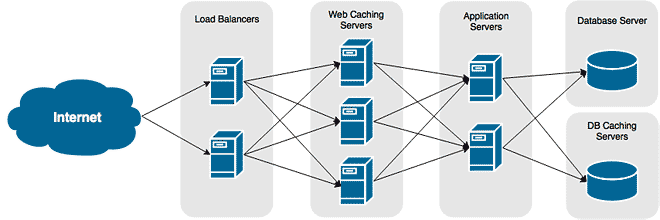
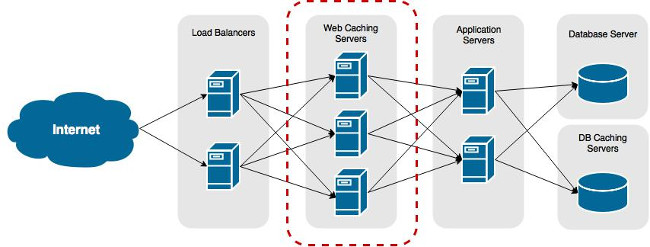
Most web sites have large amounts of content that remains unchanged or is rarely modified after publication. And everytime it is requested from the web server, modified or not, it is reprocessed and transmitted to the client, unnecessarily consuming valuable system resources and network bandwidth. As your website or application gains in popularity, more demand we be put on your server to process content that is, although dynamically generated, static.
This isn’t an efficient use of resources and it will eventually end up costing you a lot of money, as you install more hardware to keep up with load. This is were caching comes in. Let’s not waste CPU cycles or RAM processing previously accessed content that is unlikely to change within a determined amount of time. Instead, we’ll serve pre-processed content, temporarily stored on the server or the web browsers cache. And only after content has been modified or a set amount of time has passed will we reprocess the requested content.
Configure Caching in Apache
Apache comes with three modules for caching content, one enables it and the remaining two determine where the cache store exists – on disk or in memory. Determining which module to use for the cache store depends on your available hardware resources and performance requirements.
Serving from disk is slow but less expensive. Serving from memory is fast, but expensive – both in cost and in resource consumption. However, you can boost disk cache performances by placing it on SSDFLASH storage instead of conventional spinning disk.
- Ensure the cache_module is being loaded by Apache, by verifying the following line exists in Apache’s server configuration file, uncommented.
LoadModule cache_module modules/mod_cache.so
- For disk caching, ensure the disk_cache_module is being loaded by Apache. Look for the following line, uncommented.
LoadModule disk_cache_module modules/mod_disk_cache.so
- Add the following lines in to either the Apache server configuration file (for global) or inside of a VirtualHost directive (application localized).
CacheEnable disk /
CacheRoot /webapps/cache/app1
CacheDefaultExpire 3600
CacheDisable /wp-admin
CacheEnable disk / Unable caching to disk for relative directory “/”. Cacheroot Set the cache store directory, where all cached content will be saved. CacheDefaultExpire Set the default expire date, relative to the original request date, in seconds. CacheDisable Disables caching for relative paths following the option. Sensitive areas and those that shouldn’t be cached should be added here.
Setting Content Expiration
Caching requires an expiration date for it to work. Without an expiration date on your content, the cache cannot determine if it is stale or not.
Use Apache’s Mod_Expires
This module allows you to define expiration dates for your content, as a whole or individually based on type or matching string.
- Ensure the module is being loaded into Apache. Open the server configuration file (httpd.conf in CentOS) and look for this line. Uncomment it, if it is commented out with a ‘#’.
LoadModule expires_module modules/mod_expires.so
- Add the following lines to either the Apache server configuration, a virtual host configuration, a directory directive, or .htaccess, depending on where you want your caching policy set.
<IfModule mod_expires.c>
        ExpiresActive On
        ExpiresDefault "access plus 1 day"
</IfModule></pre>
ExpiresActive On Turns on mod expires. ExpiresDefault Set the default expiration date for all content. Access plus 1 day sets the expiration time to the content’s access time + 1 day, meaning it will be cached for 24 hours. - If you want to assign different expiration values to specific content types, you can use the ExpiresByType option, in addition to or without the ExpiresDefault option. Here are a few examples:
<IfModule mod_expires.c>
        ExpiresActive On
        ExpiresDefault "access plus 1 day"
        ExpiresByType image/jpg "access plus 5 days"
        ExpiresByType image/jpeg "access plus 5 days"
        ExpiresByType image/gif "access plus 5 days"
        ExpiresByType image/png "access plus 5 days"
        ExpiresByType text/css "access plus 1 month"
        ExpiresByType application/pdf "access plus 1 month"
        ExpiresByType text/x-javascript "access plus 1 month"
        ExpiresByType application/x-shockwave-flash "access plus 1 month"
        ExpiresByType image/x-icon "access plus 1 year"
</IfModule>
Use HTTP Headers in the Web Application
Expiration and last modification dates can be defined by the web application using HTTP Header parameters. This gives content freshness control to the developers or the application. How you do this depends on your application.
- HTML
Use the Meta tag and define the content age. In the example below, set the cache to private (requesting client only) and the maximum age to 1 hour (3600 seconds).
<meta http-equiv="Cache-control" content="private,max-age:3600"> - PHP
Use the Header() function to set the content age in the documents header.header("Cache-Control: private, max-age=3600");
Cache Non-Expiring Content
Somtimes you need to cache content that doesn’t have an expiration date set. As mentioned earlier, expiration dates are a requirement for the caching mechanism to work, by default. However, we can instruct Apache to append a default expiration date to contents that have no defined an expiration date, and cache it. The CacheIgnoreNoLastMod allows us to do this.
- Add the CacheIgnoreNoLastMod option with a value of On to location where you have enabled caching – Apache’s server configuration file or a Virtual Hosts configuration file.
CacheEnable disk /
CacheRoot /webapps/cache/app1
CacheDefaultExpire 3600
CacheDisable /wp-admin
CacheIgnoreNoLastMod On
Prevent Browsers from Caching Content
The problem with the above caching configurations is your application’s contents are cached in two locations: on the client and on the server. If you update your content and want the user to see it immediately, they may not be able to if their locally cached version hasn’t expired. You can shorten the expiration time, but then you may defeat the purpose of caching entirely.
Take full control of caching, instead, by enabling it on the server only. Force the web browser to obtain the content from the server for every request, but serve preprocessed Java or PHP content, for example, unless the content has been modified. This ensures the user always sees the most recent version, while not wasting CPU cycles or RAM reprocessing unnecessarilly.
- Add the CacheIgnoreCacheControl option to the location have caching enabled – Apache’s server configuration file or a virtual host’s configuration – with a value of On . This causes Apache to ignore browser content refresh requests. All content will be served from the server’s cache, where possible, until it has expired.
CacheEnable disk /
CacheRoot /webapps/cache/app1
CacheDefaultExpire 3600
CacheDisable /wp-admin
CacheIgnoreNoLastMod On
CacheIgnoreCacheControl On
- Save your changes.
- Restart Apache to apply your changes.
WordPress and Other Application Frameworks
Frameworks, like WordPress’ and ones similar to CodeIgniter, route all content through Index.php. Depending on how you’ve written your mod_rewrite rules, your cached content will display incorrectly. You may find that contents for one requested page, category, etc, show up in place of what was actually requested.
To combat this, we need to ensure Apache’s cache considers the parameters appended to the end of the index.php when content is cached and pulled. Modify the Rewrite rule for index.php, as seen in the example below.
# WordPress Permalink rewrites
RewriteBase /
RewriteRule ^index.php$ – [L]
RewriteCond %{REQUEST_FILENAME} !-f
RewriteCond %{REQUEST_FILENAME} !-d
RewriteRule ^(.*)$ /index.php/$1 [L]


