Overview
Unlike relation database servers, scaling NoSQL databases to meet increased demand on your application is fairly simple – you drop in a new server, make a couple of config changes, and it connects to your existing servers, enlarging the cluster. All existing databases and collections are automatically replicated and synced with the other member nodes.
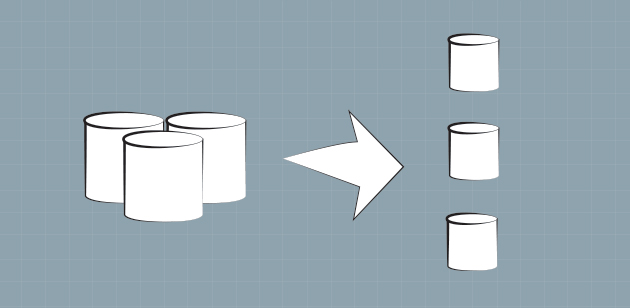
A replication cluster works well when the entire data volume of your database(s) is able to fit onto a single server. Each server in your replication cluster will host a full copy of your databases.
Server Configuration
| Hostname | Starting Role | IP Address |
|---|---|---|
| mongodb01.serverlab.intra | Master | 10.0.0.10 |
| mongodb02.serverlab.intra | Slave | 10.0.0.11 |
| mongodb03.serverlab.intra | Slave | 10.0.0.12 |
Creating a Keyfile to secure MongoDB Cluster Traffic
The keyfile stores the password used by each node. The password allows each node to authenticate to each other, allowing them to replicate changes between each other. This password should be long and very complex. We’ll use the OpenSSL command to ensure our password is complex.
-
- Log onto one of your MongoDB servers.
- From the command line, execute the following command. This will generate a long random string of characters that will be used to increase encryption strength. We pipe the output to a file, which will be used as the Keyfile.
openssl rand -base64 741 > keyfile
- Create the directory where the key will be stored.
sudo mkdir -p /opt/mongodb
- Copy the file to the new directory.
sudo cp keyfile /opt/mongodb
- Set the ownership of the keyfile to mongodb.
sudo chown mongodb:mongodb /opt/mongodb/keyfile
- Set the appropriate file permissions.
sudo chmod 0600 /opt/mongodb/keyfile
- Copy the Keyfile to each server that will be a member of the replication cluster.
Preparing for MongoDB Replication
The following instructions should be followed on all MongoDB servers expected to form the cluster.
Preparing for Replication
- Log onto the MongoDB server that will start off as the master.
- Open the MongoDB configuration file into a text editor.
sudo vi /etc/mongod.conf
- Find the network interfaces section of the configuration file.
- Set the value of bindIp to either 0.0.0.0 to allow communication over any network interface or add the IP address of a specific network interface.
# network interfaces
net:
  port: 27017
  bindIp: 0.0.0.0
- Find the commented out security section of the configuration file.
- Uncomment security:.
- Using the path of the keyfile created earlier, and set the keyFile option.
security:
  keyFile: /opt/mongodb/keyfile
- Continue down the configuration file until you reach the replication section.
- Uncomment replication: and set the replSetName option. ReplSetName sets the name of the replication cluster, and all nodes of the cluster must use the same name.
replication:
  replSetName: app1r0
- The configuration file on each MongoDB server should look similar to this.
# mongod.conf # for documentation of all options, see: # http://docs.mongodb.org/manual/reference/configuration-options/ # Where and how to store data. storage: dbPath: /var/lib/mongodb journal: enabled: true # engine: # mmapv1: # wiredTiger: # where to write logging data. systemLog: destination: file logAppend: true path: /var/log/mongodb/mongod.log # network interfaces net: port: 27017 bindIp: 0.0.0.0 #processManagement: security: keyFile: /opt/mongodb/keyfile #operationProfiling: replication: replSetName: app1r0 #sharding: ## Enterprise-Only Options: #auditLog: #snmp: - Restart MongoDB to apply our changes.
sudo service mongod restart
Creating the Replication Set
Create Root Admin Account
The default MongoDB configuration is wide open, meaning anyone can access the stored databases unless your network has firewall rules in place.
- Log onto the MongoDB master server. In our example, it will be mongodb01.serverlab.intra.
- Log into the Mongo console
mongo
- Select the admin database.
use admin
- Create the Root admin account.
db.createUser( {
    user: "RootAdmin",
    pwd: "",
    roles: [ { role: "root", db: "admin" } ]
  });
Initiate the Replication Set
- While still in the Mongo console, run the following command.
rs.initiate()
- The following message will output when the replication set is initiated.
{ "info2" : "no configuration explicitly specified -- making one", "me" : "mongodb01:27017", "ok" : 1 } - Verify initiation completed successfully by viewing the replication config.
rs.conf()
- The output should look similar to the following.
{
        "_id" : "app1r0",
        "version" : 1,
        "members" : [
                {
                        "_id" : 0,
                        "host" : "mongodb01:27017",
                        "arbiterOnly" : false,
                        "buildIndexes" : true,
                        "hidden" : false,
                        "priority" : 1,
                        "tags" : {

                        },
                        "slaveDelay" : 0,
                        "votes" : 1
                }
        ],
        "settings" : {
                "chainingAllowed" : true,
                "heartbeatTimeoutSecs" : 10,
                "getLastErrorModes" : {

                },
                "getLastErrorDefaults" : {
                        "w" : 1,
                        "wtimeout" : 0
                }
        }
}
Adding the Slaves to the Replication Set
- Add the member servers to the cluster.
rs.add("mongodb02.serverlab.intra:27017")rs.add("mongodb03.serverlab.intra:27017") - If the servers were added correctly, you’ll get the following output for each.
{ "ok" : 1 } - Check the status of the replication cluster.
rs.status()
- You’ll notice from the output that the two slave nodes have been added, but are not ready to receive the databases.
{
        "set" : "app1r0",
        "date" : ISODate("2015-10-18T18:29:31.692Z"),
        "myState" : 1,
        "members" : [
                {
                        "_id" : 0,
                        "name" : "mongodb01:27017",
                        "health" : 1,
                        "state" : 1,
                        "stateStr" : "PRIMARY",
                        "uptime" : 541,
                        "optime" : Timestamp(1445192965, 1),
                        "optimeDate" : ISODate("2015-10-18T18:29:25Z"),
                        "electionTime" : Timestamp(1445192531, 2),
                        "electionDate" : ISODate("2015-10-18T18:22:11Z"),
                        "configVersion" : 2,
                        "self" : true
                },
                {
                        "_id" : 1,
                        "name" : "mongodb02.serverlab.intra:27017",
                        "health" : 1,
                        "state" : 0,
                        "stateStr" : "STARTUP",
                        "uptime" : 6,
                        "optime" : Timestamp(0, 0),
                        "optimeDate" : ISODate("1970-01-01T00:00:00Z"),
                        "lastHeartbeat" : ISODate("2015-10-18T18:29:31.089Z"),
                        "lastHeartbeatRecv" : ISODate("1970-01-01T00:00:00Z"),
                        "pingMs" : 0,
                        "configVersion" : -2
                }
        ],
        "ok" : 1


