Overview
Keepalived is a light-weight and lightening fast load balancer. It’s also one of the only load balancers available for CentOS and Red Hat Enterprise Linux that isn’t just a reverse-proxy. This is an important distinction when load balancing large files and multimedia.
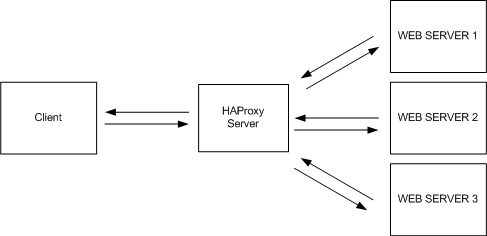
Reverse-proxy load balancers, such as HAProxy and Nginx, funnel all incoming and outgoing traffic through themselves. This means the load balancers must have enough network capacity to handle all incoming and outgoing requests. For standard websites serving HTML, Javascript, CSS, and small image files, this isn’t a problem. When dealing with large files, however, a reverse-proxy load balancer presents a scaling issue.
A reverse-proxy load balancer balancing 4 nodes with 10Gb worth of traffic each would require a 40GbE connection to the network to keep up. A Direct Routing balancer only requires enough network to forward to initial request. The backend web server then responds directly to the client making the request for content. This is why they work really well when serving large data.
This tutorial will show you how to deploy a active\passive load balancer clusting using Keepalived. The cluster in our example will balance two web servers hosting MP4 video assets for a video player.
Objectives
- Install Keepalived on CentOS 6.5.
- Configure a single virtual server instance.
- Balance traffic to two backend web servers using Direct Routing.
Create a Load Balancer Cluster
The two load balancers will have the following configurations. These are for demostration only, as the requirements for your environment will likely differ. The most important component will be your network, followed by CPU and then RAM. Because we’re using Direct Routing, our network requirements are minimal.
| Hostname | IP | CPU | RAM | NIC | Role |
|---|---|---|---|---|---|
| lb01 | 172.30.0.20 | 1 | 1 GB | 1Gb | Active Balancer |
| lb02 | 172.30.0.21 | 1 | 1 GB | 1Gb | Passive Balancer |
The load balance cluster we create for the two servers will be assigned a virtual IP address. This IP allows us to connect to the active node in our cluster entity.
| Virtual IP | DNS Hostname |
|---|---|
| 172.30.0.22 | lb-cluster1.serverlab.intra |
Create the Cluster’s Virtual IP
We need to assign an IP address to the load balancer cluster. This allows us to connect to the cluster’s active node, which ever it maybe at the time. We’re essentially creating its entity on our network. To add a virtual IP, we need to attach it to an existing network interface.
In this example, ETH0 will be the network interface we attach our virtual IP to. Depending on your hardware, the interface name may be different.
- Create a new network interface file using the same name as the interface you will be attaching the virtual IP to, and append “:” and then a number. In our example, since we are using ETH0 and this is our first virtual IP, the interface will be called ETH0:0.
touch /etc/sysconfig/network-scripts/eth0:0
- Open the new interface file into a text editor, like Nano or VI.
vi /etc/sysconfig/network-scripts/eth0:0
- Modify the file to look like the example below. Remember to match the settings to your environment.
DEVICE=eth0:0
TYPE=Ethernet
ONBOOT=yes
IPV6INIT=no
NM_CONTROLLED=no
BOOTPROTO=none
IPADDR=172.30.0.22
PREFIX=24
GATEWAY=172.30.0.1
- Save your changes and exit the editor.
- Bring the new interface online.
ifup eth0:0
- Using the ifconfig command, you should you see your new network interface.
eth0:0 Link encap:Ethernet HWaddr 00:50:56:8E:13:88 inet addr:172.30.0.22 Bcast:172.30.0.255 Mask:255.255.255.0 UP BROADCAST RUNNING MULTICAST MTU:1500 Metric:1 - Do this on all load balancers to be used in this cluster.
Enable Packet Forwarding
Direct Routing style load balancers are essential layer-3 routers. They receive the incoming request and then re-route it to one of the backend servers. By default, CentOS and Red Hat both disallow forwarding. We need to enable it on all load balancers.
- Open
<strong>/etc/sysctl.conf</strong>into a text editor. - Find the following option. If it doesn’t exist, then added it.
net.ipv4.ip_forward
- Set its value to 1 to enable forwarding.
net.ipv4.ip_forward = 1
- Save your changes. They will be applied immediately.
Install Keepalived
- Log onto the first load balancer.
- Install Keepalived from the CentOS base repository.
yum install keepalived
- Configure Keepalived to start at system boot.
chkconfig keepalived on
- Start the Keepalived service (daemon).
service keepalived start
- Repeat the steps on the second load balancer.
Create the Cluster on the First Load Balancer Node
- Log onto the first load balancer.
- Backup the default keepalived configuration file.
mv /etc/keepalived/keepalived.conf /etc/keepalived/keepalived.old
- Create a new Keepalived configuration file.
touch /etc/keepalived/keepalived.conf
- Open the configuration file into a text editor, like Nano or VI.
vi /etc/keepalived/keepalived.conf
- Define the global defaults. These will be used by all virtual servers configured for this cluster. In the global defaults, we will configure e-mail receipents, an SMTP server for sending alerts, and a name for the load balancer cluster.
! Configuration File for keepalived

global_defs {
   notification_email {
::HL::     [email protected]
::HL::     [email protected]
::HL::     [email protected]
   }
   notification_email_from [email protected]
   smtp_server 192.168.200.1
   smtp_connect_timeout 30
   router_id LB_CLUSTER1
}
notification_email A list of receipients that will receive e-mail status notifications from the cluster. notification_email_from The e-mail address used by the load balancer cluster to send the notifications. smpt_server The IP address of your e-mail server or a relay server. router_id The name of your cluster. All clusters should have a unique name. - We’re now going to create our load balancer cluster. This defines the identity of the cluster, as well as its nodes. Add the following below the global_defs.
vrrp_instance VI_1 {
    state MASTER
    interface eth0
    virtual_router_id 51
    priority 100
    advert_int 1
    authentication {
        auth_type PASS
        auth_pass 1111
    }
    virtual_ipaddress {
        172.16.0.23
    }
}
vrrp_instance VI_1 Creates the virtual server instance. The value VI_1 is name given to it. Multiple instances for different load balance clusters may exist, but each instance must have a unique name. interface The network interface the cluster will be bound to. All requests for the cluster will funnel through this interface. virtual_router_id The ID of the load balancer cluster. Each cluster must have a unique number. priority The priority of the load balancer cluster node. The load balancer in a cluster with the highest priority is the active member. A passive load balancer node will have a lower priority. authentication The authentication type and password used by each load balancer in the cluster. This allows each server in the cluster to communicate, somewhat securely, its state to each other. virtual_ipaddress The IP addresses of the load balancer cluster. This IP address will be shared by all nodes in the cluster, though you will only ever connect to the active node using it. - Instruct Keepalived to reload its configuration to apply our changes.
service keepalived reload
Add Second Load Balancer to Cluster
The steps to add the second balancer are almost identical to the first balancer. The only thing that differs is the priority value, which must be lower than what’s set on the first balancer.
- Follow the same instruction as for the first balancer. Do not reload or restart the Keepalived service when done.
- Modify the priority value in the keepalived.conf file. Set it to any value lower than that of the first server’s. Since the first server has a priority of 100, we’ll set this server’s to 99.
vrrp_instance VI_1 { state MASTER interface eth0 virtual_router_id 51 ::HL::priority 99 advert_int 1 authentication { auth_type PASS auth_pass 1111 } virtual_ipaddress { 172.16.0.23 } } - Save your changes.
- Instruct keepalived to reload the configuration file.
service keepalived reload
Create a Virtual Server
The virtual server, in the context of load balancing, is the server that users connect to when accessing the balanced service. The virtual server then sends the request to one of the backend nodes. For us, that is a web server hosting video assets. There can be any number of servers in the backend of a virtual server. In this example, we only have two.
Backend Web Server Configuration
The following servers are what will be hosting our web service. When a connection request is received by the load balancers for our web service, it will be forwarded to one of these servers.
| Name | IP | Virtual IP | CPU | RAM | Role |
|---|---|---|---|---|---|
| webnode01 | 172.30.0.23 | 172.16.55.100 | 1 | 1 GB | Apache Web |
| webnode01 | 172.30.0.24 | 172.16.55.100 | 1 | 1 GB | Apache Web |
The Virtual Server
- Open the keepalived configuration file into a text editor.
- Below global_defs and vrrp_instance, add the following.
virtual_server 172.16.55.100 80 {
    delay_loop 6
    lb_algo rr
    lb_kind DR
    persistence_timeout 50
    protocol TCP
}
virtual_server 192.168.200.100 80 Defines a virtual server, it’s IP address and listening port. This is the IP address that will be used to connect to the service being balanced. In our case, a web service listening on port 80. lb_algo The algorythm that will be used for balancing. Our example uses round-robin (rr). lb_kind How traffic will be routed. We’re using Direct Routing (DR) to allow our backend to respond directly to clients. persistence_timeout If persistent connections are required, this sets the timeout to expire the connection. Persistents forces a client to always connect to the same server, which is required for user logon sessions. - Now we add our backend servers as real_servers.
real_server 172.30.0.23 80 { weight 1 HTTP_GET { url { path /testurl/test.jsp digest 640205b7b0fc66c1ea91c463fac6334d } connect_timeout 3 nb_get_retry 3 delay_before_retry 3 } } - Below the first server, we add our second real server.
    real_server 172.30.0.24 80 {
        weight 1
        HTTP_GET {
            url {
              path /testurl/test.jsp
              digest 640205b7b0fc66c1ea91c463fac6334d
            }
            connect_timeout 3
            nb_get_retry 3
            delay_before_retry 3
        }
    }
Overview of the Configuration
We’re done. The tutorial focused only on the parts of the configuration we were working on. Sometimes its easier to see the entire configuration, so I present the entire configuration file below for your reference.
! Configuration File for keepalived

global_defs {
   notification_email {
     [email protected]
     [email protected]
     [email protected]
   }
   notification_email_from [email protected]
   smtp_server 192.168.200.1
   smtp_connect_timeout 30
   router_id LB_CLUSTER1
}

vrrp_instance VI_1 {
    state MASTER
    interface eth0
    virtual_router_id 51
    priority 99
    advert_int 1
    authentication {
        auth_type PASS
        auth_pass 1111
    }
    virtual_ipaddress {
        172.16.0.23
    }
}

virtual_server 172.16.55.100 80 {
    delay_loop 6
    lb_algo rr
    lb_kind DR
    persistence_timeout 50
    protocol TCP

    real_server 172.30.0.23 80 {
        weight 1
        HTTP_GET {
            url {
              path /testurl/test.jsp
              digest 640205b7b0fc66c1ea91c463fac6334d
            }
            connect_timeout 3
            nb_get_retry 3
            delay_before_retry 3
        }
    }

    real_server 172.30.0.24 80 {
        weight 1
        HTTP_GET {
            url {
              path /testurl/test.jsp
              digest 640205b7b0fc66c1ea91c463fac6334d
            }
            connect_timeout 3
            nb_get_retry 3
            delay_before_retry 3
        }
    }

}


