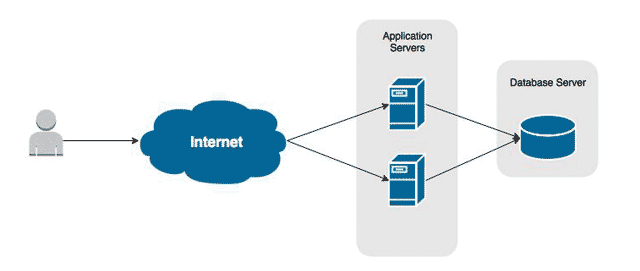
Learn how to scale your WordPress site across a large number of servers. The following tutorial will show you how to setup a replicated filesystem in GlusterFS, to store your WordPress site and share them across multiple servers. To evenly balance load across all of your WordPress servers will be deploying HAProxy.
In a previous tutorial, we should you how scale your WordPress sites using NFS. Following this method meant you had to deploy a new server to host your NFS share. It also means your NFS server becomes a single point of failure.
GlusterFS doesn’t need a server of its own. We can install it on several servers that need to share information with each other, eliminating the single point of failure.
As mentioned above, we’ll be configuring a replicated file system to host our WordPress site. Using replication every change written to disk will be nearly instantaneously replicated to our other servers. So long as your network is fast enough, being at least 1 GB, you’re unlikely to notice the latency in replication.
The Infrastructure
| Hostname | OS | Role |
|---|---|---|
| lb1 | Ubuntu 16.04 | HAProxy Load Balancer |
| wordpress1 | Ubuntu 16.04 | WordPress host, GlusterFS node |
| wordpress2 | Ubuntu 16.04 | WordPress host, GlusterFS node |
| wordpress3 | Ubuntu 16.04 | WordPress host, GlusterFS node |
Deploying HAProxy
HAProxy is a lightning-quick load balancer. It is also easy to deploy and configure.
- SSH into your HAProxy server.
- Install HAProxy
- Open the HAProxy configuration file into a text editor, such as VIM.
- Configure HAProxy to balance traffic to our three WordPress servers.
- Save your changes and exit the text editor.
Installing and Configuring GlusterFS
In order to share our WordPress install with all of our WordPress servers we will need to install GlusterFS. You will need to perform the following tasks on each server.
Installing GlusterFS
- Install GlusterFS.
sudo apt install glusterfs-server
- Create a directory to store your GlusterFS brick.
sudo mkdir -p /srv/data/wordpress
Add GlusterFS Peers and Create the Replicated Brick
Now that GlusterFS is installed on all of your WordPress servers, we need to make them peers of each other.
- Log onto one of your WordPress servers.
- Peer it with the other two WordPress servers.
gluster peer probe wordpress2 wordpress3
- Verify peer status.
sudo gluster peer status
- Create a GlusterFS volume named wordpress-vol using all three WordPress servers as peers.
sudo gluster volume create wordpress-vol replica 3 transport tcp wordpress1:/srv/data/wordpress wordpress2:/srv/data/wordpress wordpress3:/srv/data/wordpress
If the GlusterFS volume is created on the same disk volume as your as your Linux root partition, you will need to append ‘force’ to end of the command. It’s best practice to place GlusterFS volumes on a separate disk, but in some scenerios you may not be able to.
sudo gluster volume create wordpress-vol replica 3 transport tcp wordpress1:/srv/data/wordpress wordpress2:/srv/data/wordpress wordpress3:/srv/data/wordpress force
- Start the wordpress-vol volume.
gluster volume start wordpress-vol
- Verify your volumes settings.
sudo gluster volume info
- Allow only your WordPress servers to mount the GlusterFS volume.
sudo gluster volume set wpsite1vol auth.allow wordpress1,wordpress2,wordpress3
Mount the Replicated Brick
The following task will need to done on all WordPress servers. Because GlusterFS is installed locally on each one with a configured storage brick, we can mount the brick from each server locally. The benefit here is that if any of the other WordPress servers goes offline, the remaining server will still have access to all of its content.
Apache’s default web root is /var/www/html. We are going to mount our GlusterFS replicated volume as that directory.
- Open fstab into a text editor.
sudo vi /etc/fstab
- Add the following line to fstab on each server to make the mount persistent. This means it will be mounted automatically after each boot. Remember to change wordpress1 to wordpress2 or wordpress3 on the remaining servers.
wordpress1:/wordpress-vol /var/www/html glusterfs defaults,_netdev,log-level=WARNING,log-file=/var/log/gluster.log 0 0
- Save your changes and exit the text editor.
- Mount the new GlusterFS volume.
mount -a
Deploying WordPress
Our WordPress servers all going to be powered by Apache2. We’ll need to install PHP and all required depenedant modules for running our WordPress site on Apache2 and MySQL.
Installing Apache and PHP
- Install Apache2.
sudo apt install apache2
- Install PHP and the PHP MySQL module.
sudo apt install php php-mysql
- Install the PHP module for Apache2
sudo apt install apache2-mod-php7.0
- Restart Apache2 to load the new PHP module.
sudo systemctl restart apache2
Installing WordPress
- Download the latest version of WordPress.
wget http://wordpress.org/latest.tar.gz
- Extract the contents of the tar file into our GlusterFS volume — the web root for our site, as configured in Apache.
tar xvf latest.tar.gz -C /var/www/html --strip-components=1


