Overview
Out of the box, a Windows Server 2012 and Windows 8 cannot connect to NFS-based shares from your Linux environment by default. Although, they both include a feature that when enable does allow them to.
Microsoft likes to trumpet that 90% of servers deployed in enterprise environments run Windows Server. But that still means there are a lot of Linux\Unix servers out there. When you include startups and mid-sized companies, the number of Linux servers grows substantially.
With the growth of Linux adoption, especially at the small-to-medium sized business, odds you may eventually need to connect a Windows server or a Windows desktop to an NFS share.
Install NFS Client Feature
The NFS client is now an installable feature in Windows 8 and Windows Server 2012 and higher.
- Launch Server Manager
- On the top-left side of the console, click Manage.
- Click Add Roles and Features.
- On the Before you begin screen, click Next.
- On the Select installation type screen, select Role-based or feature-based installation, and then click Next.
- On the Select destination server screen, if you are installing to the local server, click Next. Otherwise, select a server from the Server Pool list.
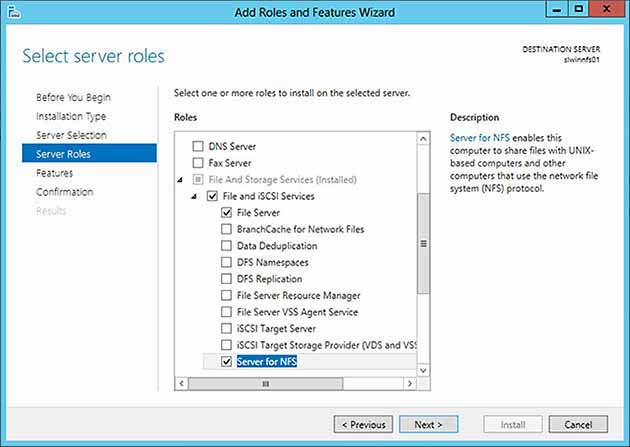
- On the Select server roles screen, click Next.
- On the Select features screen, scroll down the list of available features until you see Client for NFS. Click its checkbox to select it for installation, and then click Next.
- On the Confirm installation selections screen, review your selections and then click Install.
- After the installation completes, review the results and then click Close.
Mount NFS Share
To mount an NFS share into Windows we need to use the mount command. There is no GUI interface to perform this task. The command is very simple to use and relatively similar to the same command found in Linux.
The examples below will connect to a host named LNXSRV01. The local user account on LNXSRV01 that will be used to mount the share will be Sam.
- Open a command-prompt.
- Mount an NFS share called /exports/dept to the Z:.
mount -user:Sam -p:MyPassword \\LNXSRV01\exports\dept Z:
Instead of typing the password into the command-line, we can use ‘*’ to force a password prompt when mounting.
mount -user:Sam -p:* \\LNXSRV01\exports\dept Z:
To mount the share into any available drive letter on the Windows server we can replace Z: with ‘*’.
mount -user:Sam -p:* \\LNXSRV01\exports\dept *
Set whether the mount type is hard or soft using the mtype option.
mount -o mtype=hard -user:Same -p:* \\LNXSRV01\exports\dept *
Persistent Mounts
There is no method of creating a persistent mount of an NFS share on a Windows server. The only option to mount an NFS share at system boot or logon is to use a batch script. This, however, is not recommended.

